
前回は人物の顔を認識してモザイクをかけるという処理を紹介しました
関連記事:【Python】Face RecognitionとOpenCVで人物の顔にモザイク処理を行う
今回はそれを特定の人物の顔にだけ行う処理を行いたいと思います。
Contents
前準備と実行環境
Face Recognitionはディープラーニングが使われているのでGPUが必要になります。
自分のPCにはGPUが無かったのでColabで動作することを想定しています。
ColabでGPUを使用する
Face Recognition はインストール時でdlibをビルドが必要になるためGPUを使わないと以下のようなエラーになります。
Error while calling cudaGetDevice(&the_device_id) in file /tmp/pip-install-8rhciq4o/dlib_838b2895161a4c358d1084826c17d7fd/dlib/cuda/gpu_data.cpp:204. code: 100, reason: no CUDA-capable device is detected
これを回避するためにまずGooglecolabratoryでコード実行に際に「GPU」で実行するように設定を変更します。具体的にはNotebookの「編集」→「ノートブックの設定」→「ハードウェア アクセラレータ」を「GPU」に変更して「保存」で設定完了です。
参照:https://pyming.info/2021/06/04/colab_gpu/
ライブラリのインストール
次にライブラリをインストールします。
$ pip install face_recognition
インストールが完了したらライブラリを読み込めるか確認します。
import face_recognition
画像の用意
まず前提条件としてオバマ大統領の顔を識別したいとします。
認識させたい顔
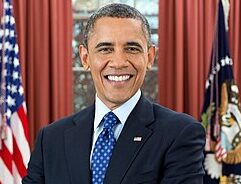
URL:https://tkstock.site/wp-content/uploads/2022/12/President_Barack_Obama-e1670777913971.jpg
モデルに判定させる顔画像

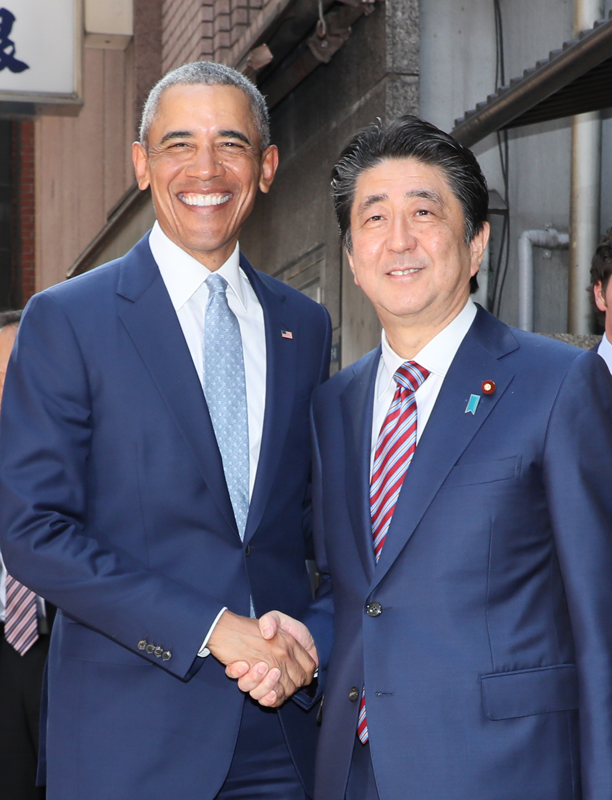

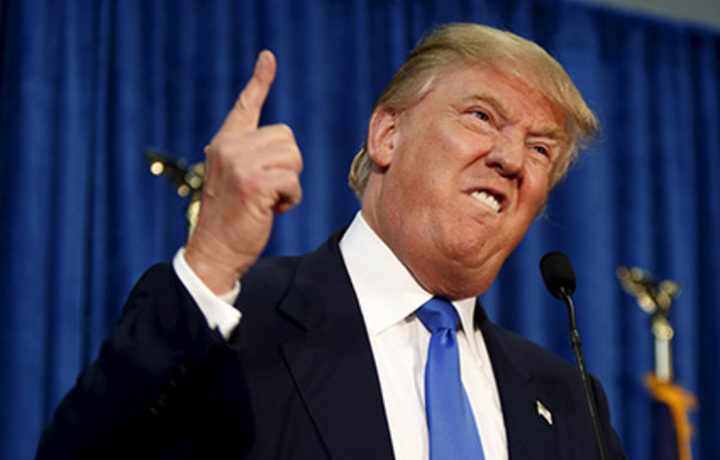
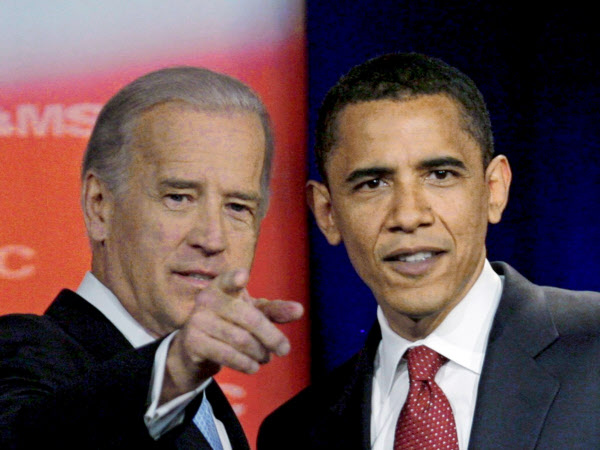
<画像のURL>
https://tkstock.site/wp-content/uploads/2022/12/123740.jpg
https://tkstock.site/wp-content/uploads/2022/12/25lunch01.jpg
https://tkstock.site/wp-content/uploads/2022/12/97399196_mediaitem97399195.jpg
https://tkstock.site/wp-content/uploads/2022/12/reizei20150827-thumb-720xauto-720×460-1.jpg
FaceRecognitionで特定の人物の顔だけにモザイクを掛ける
下記が実際に顔認識を行うサンプルコードです。
処理の流れとしてはまず判定したい顔をURLで指定し、リストに指定した画像を1枚ずつfor文で読み込み、顔の座標を特定→その顔が判定したい顔なのか判定→Trueだった場合はモザイク処理、という流れです。
!pip install face_recognition==1.2.3
import os
import cv2
import face_recognition
import matplotlib.pyplot as plt
import requests

# 認証したい人の顔のURL
img_url = 'https://tkstock.site/wp-content/uploads/2022/12/President_Barack_Obama-e1670777913971.jpg'
r = requests.get(img_url)
img_path = 'known.jpg'
with open(img_path, 'wb') as saveFile:
    saveFile.write(r.content)
img = cv2.imread(f'/content/{img_path}')
# 認証する人物の顔の画像を読み込む。
face_img_to_check = face_recognition.load_image_file(f'/content/{img_path}')
face_loc_to_check = face_recognition.face_locations(face_img_to_check, model="cnn")
(face_encoding_to_check,) = face_recognition.face_encodings(
    face_img_to_check, face_loc_to_check
)
# 画像の表示
print('認証したい人の顔')
plt.imshow(cv2.cvtColor(img, cv2.COLOR_BGR2RGB)) # OpenCV は色がGBR順なのでRGB順に並べ替える
plt.show()


# モザイク処理
def pixelate(src, ratio=1):
    small = cv2.resize(src, None, fx=ratio, fy=ratio, interpolation=cv2.INTER_NEAREST)
    return cv2.resize(small, src.shape[:2][::-1], interpolation=cv2.INTER_NEAREST)


def pixelate_area(src,loc,ratio=0.1):
  dst = src.copy()
  for i, (top, right, bottom, left) in enumerate(loc):
        w, h = right - left, bottom - top
        dst[top:top + h, left:left + w] = pixelate(dst[top:top + h, left:left + w], ratio)
  return dst


# 保存されている人物の顔の画像を読み込む。
known_face_imgs = []
img_list =  [
    'https://tkstock.site/wp-content/uploads/2022/12/123740.jpg'
,'https://tkstock.site/wp-content/uploads/2022/12/25lunch01.jpg'
,'https://tkstock.site/wp-content/uploads/2022/12/97399196_mediaitem97399195.jpg'
,'https://tkstock.site/wp-content/uploads/2022/12/reizei20150827-thumb-720xauto-720x460-1.jpg'
,'https://tkstock.site/wp-content/uploads/2022/12/https___imgix-proxy.n8s.jp_DSXMZO5921788017052020FF8001-PN1-5.jpg'
             ]

count = 0
for path in img_list:
    known_face_encodings = []
    r = requests.get(path)
    with open(f'train_{count}.jpg', 'wb') as saveFile:
        saveFile.write(r.content)
    img = face_recognition.load_image_file(f'train_{count}.jpg')
    loc_a = face_recognition.face_locations(img, model="hog")
    dst = img.copy()
    for loc in loc_a:
        a = []
        b = []

        a.append(loc)
        print(a)
        (encoding,) = face_recognition.face_encodings(img, a)
        b.append(encoding)

        matches = face_recognition.compare_faces(b, face_encoding_to_check)
        print(matches)
        if matches[0]==True:
            # 画像の表示
            dst = pixelate_area(dst,a,ratio=0.1)
    # 画像の表示
    fig, ax = plt.subplots()
    ax.set_axis_off()
    ax.imshow(dst)
    # plt.show()
    count += 1
コードは下記にあります

他にも何かございましたらMENTAにてご相談いただけますと幸いです。
コメント